Excel 2007
Lesson 1: Entering Text and Numbers
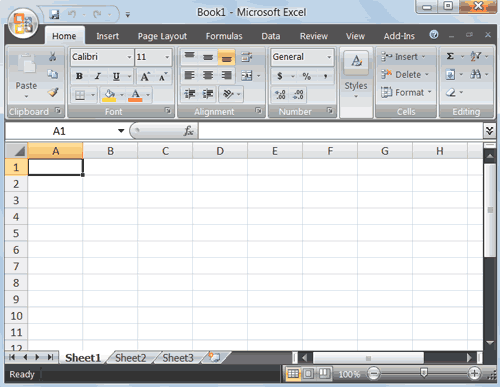
- The Microsoft Excel Window
- The Microsoft Office Button
- The Quick Access Toolbar
- The Title Bar
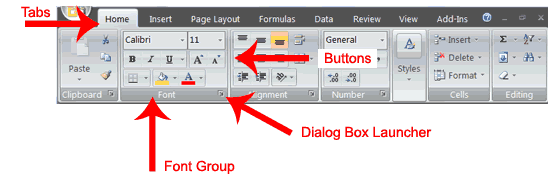
- The Ribbon
- Worksheets
- The Formula Bar
- The Status Bar
- Move Around a Worksheet
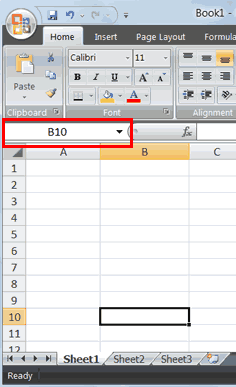
- Go To Cells Quickly
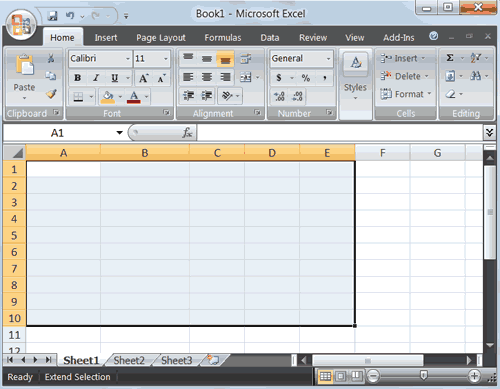
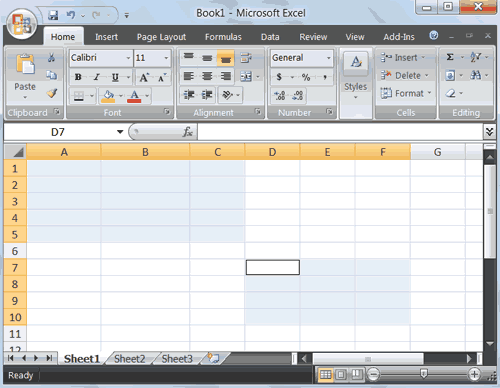
- Select Cells
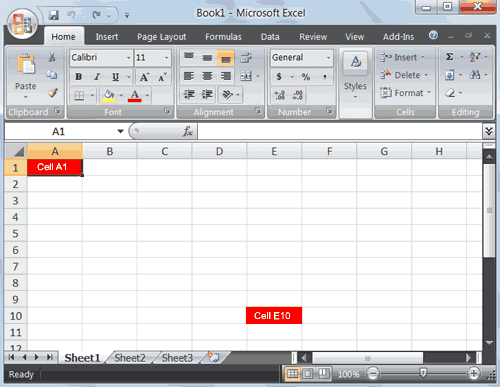
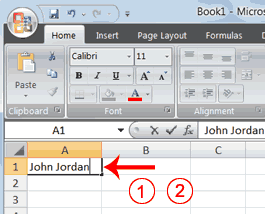
- Enter Data
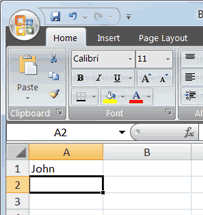
- Edit a Cell
- Wrap Text
- Delete a Cell Entry
- Save a File
- Close Excel
Lesson 2: Entering Excel Formulas and Formatting Dat
- Set the Enter Key Direction
- Perform Mathematical Calculations
- AutoSum
- Perform Automatic Calculations
- Align Cell Entries
- Perform Advanced Mathematical Calculations
- Copy, Cut, Paste, and Cell Addressing
- Insert and Delete Columns and Rows
- Create Borders
- Merge and Center
- Add Background Color
- Change the Font, Font Size, and Font Color
- Move to a New Worksheet
- Bold, Italicize, and Underline
- Work with Long Text
- Change a Column's Width
- Format Numbers
Lesson 3: Creating Excel Functions, Filling Cells, and Printing
- Using Reference Operators
- Understanding Functions
- Fill Cells Automatically
- Create Headers and Footers
- Set Print Options
- Print
Lesson 4: Creating Charts
- Create a Chart
- Apply a Chart Layout
- Add Labels
- Switch Data
- Change the Style of a Chart
- Change the Size and Position of a Chart
- Move A Chart to a Chart Sheet
- Change the Chart Type
آخرین ویرایش: